How to Work with Localization
Overview
Flutter Dashboard UI Kits uses Flutter’s built-in Localization system along with the intl package. All translatable strings are managed inside the auto-generated file, lib/generated/l10n.dart. This allows your dashboard to support multiple languages easily (English, Indonesian, etc.).
Localization File Structure
Localization files are stored under:
lib/l10n/Typical files:
lib/l10n/
 ├── intl_en.arb
 ├── intl_id.arb
└── intl_...(other language).arbEach .arb file contains key–value pairs, for example:
intl_en.arb
{
  "dashboard": "Dashboard",
  "reports": "Reports",
  "settings": "Settings"
}intl_id.arb
{
  "dashboard": "Dasbor",
  "reports": "Laporan",
  "settings": "Pengaturan"
}Flutter will auto-generate the translations into:
generated/l10n.dartHow to Add a New Language
Step 1 — Create a new ARB file
Example for Spanish:
lib/l10n/intl_es.arbAdd translations:
{
  "dashboard": "Panel",
  "reports": "Informes",
  "settings": "Configuración"
}Step 2 — Regenerate translation file
Run:
dart run intl_utils:generateThis updates:
lib/generated/l10n.dartStep 3 — Add language to Language Selector
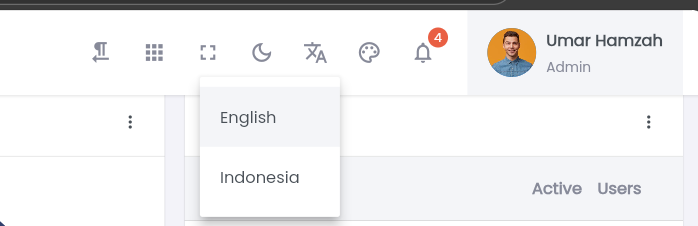
A Language Selector is a User Interface (UI) element that allows users to easily choose and change the display language of a website, application, or digital platform. Its primary function is to enhance global accessibility and improve User Experience (UX) by enabling multilingual support, ensuring that interface texts, labels, and content are displayed in the language most familiar to the user. In FlutKit Dashboard UI Kits, this selector appears as a dropdown menu at top navigation bar.
Open:
/lib/views/widgets/advanced_ui/top_nav_bar_widget.dartFind and add new translation configuration:
const localeMenuConfigs = [
  LocaleMenuConfig(
    languageCode: 'en',
    name: 'English',
  ),
  LocaleMenuConfig(
    languageCode: 'id',
    name: 'Indonesia',
  ),

  // add new translation config here
  LocaleMenuConfig(
    languageCode: 'es', // Spanish Code
    name: 'Español',    // Spanish language name
  ),
];Localization is now ready, user can select to new added translation. Currently, this utilizes mockup data. You can create services based on this data structure to integrate with your actual backend.
Step 4 — Set default language (optional)
To set the default language for your dashboard, follow these simple steps. This process ensures that your app starts with your preferred language automatically when a user opens it for the first time.
1. Locate the Configuration File
Open your project folder and navigate to the following directory:lib > configs > global_config.dart
2. Find the Locale Variable
Look for the line of code that defines the defaultLocale. It should look like this:
static const String defaultLocale = "en";3. Update the Language Code
Replace the value inside the quotation marks ("en") with your desired language’s ISO 639-1 code.
- For example, if you want to set the default language to Indonesian, change it to:
static const String defaultLocale = "id";- If you want Spanish, change it to:
static const String defaultLocale = "es";4. Save and Restart
After making the change, Save (Ctrl+S) the file. To see the changes take effect in your app, perform a Hot Restart or rebuild the application.
Common Language Codes
Here is a quick reference table for common language codes:
| Language | Code |
|---|---|
| English | en |
| Indonesian | id |
| Spanish | es |
| French | fr |
| Arabic | ar |
| Chinese | zh |
Note: Ensure that the language code you choose is also supported in your translation files (located in
lib/l10n/), otherwise the app may default back to English or show missing text.
How to Use Translated Text in Widgets
To access any translation:
Lang.of(context).dashboardExample:
Text(Lang.of(context).dashboard);This automatically switches based on the active locale.
